How to Add a New Product Using Link
How to add information about a new inventory product in the Link app
Overview
In this guide, we will walkthrough creating a new product draft from within the Upright Link app, as well as how to view and edit your existing draft products.
Table of Contents
Getting Started
After signing into the app, click on "New Product" at the top of the Dashboard:
Add Photos of Your Product
You can add photos of your product in one of two ways:
-
Use the camera tool
-
Add photos from your library

How to Use the Camera Tool
- From the "New Product" page, click on "Tap to open camera"
- Click the white circle button to take as many photos as you'd like
- Click the three dots menu to open the camera options

- Click the sun icon to adjust the brightness
- Click the magnifying glass icon to zoom in or out
- Click the lightning icon to use the flash
- Be sure to take multiple photos so the product is completely captured
- After taking your photos, click on "Use photos" in the top right corner

How to Add Photos From Your Library
-
From the "New Product" page, click on "Add from my Photo Library"
-
Click on the photos to select them
.gif)
How to Edit Photos
- Click on a photo and click "Edit" in the upper right corner

-
Click on "Transform" to zoom, rotate, or crop the photo
- Click "Adjust" to adjust the the images brightness, clarity, saturation, etc.
- If you don't like a change you made, click the curved arrow facing left to undo the last change
-
Click the curved arrow facing right to redo the last change
- Click the "X" in the bottom left corner to cancel all changes
-
Once you complete all of your changes, click the down arrow in the bottom right corner to save the changes to the photo:

Transform tool
The "Transform" tool allows you to adjust the photo by zooming in, rotating, or cropping it.
- Click the "X" in the bottom left to cancel all changes
-
Click the checkmark in the bottom right to save changes to the photo

Adjust tool
The "Adjust" tool allows you to adjust the the images brightness, contrast, saturation, clarity, shadows, highlights, exposure, gamma, blacks, whites, temperature, and sharpness.
- Click the curved arrow facing left to undo the last change
- Click the X in the bottom left to cancel all changes
- Click the checkmark in the bottom right to save changes to the photo

How to Rearrange Photos
Change the order of photos by holding down the photo you'd like to move, and dragging it into the new position:.gif)
How to Remove Photos
To select one or more photos to remove at a time:
- Click on "Bulk Select"
- Click on the photos that you would like to remove
- Click "Remove


Add Product Information
- Enter a Title
- Click "Generate" to create a SKU. If the item already has a barcode, click the scanner icon in the SKU box to scan the barcode. You can change the barcode/SKU by clicking the "Generate" button again. The SKU will be important for keeping track of your product's journey
- Search for or select the category that represents your item
- Choose the correct Supplier. Note: If the item came from a manifest created on Upright Lister, the supplier will auto assign
- Choose the Inventory Location
- Select the Listing Strategy
.gif)
Add Product Measurements
Enter in your product's length, width, height, and weight. Note: Adding in your product's measurements is optional at this stage. You do not need to fill in this section to save your product.
.gif)
Add Shipping Information
Enter in your product's package weight, box, and shipping method. Note: Adding in your product's shipping information is optional at this stage. You do not need to fill in this section to save your product.
.gif)
Save Your Product
-
Click the "Save" button in the upper left corner to save your product
-
After you save your product, a draft will appear on Upright Lister
Note: Only a "Title" is required to save a draft.
How to View Your Draft Products
-
Click "Search" in the main dashboard
-
Click the "All" dropdown menu in the top right corner
-
Select "Draft only" from the list
.gif)
How to Add Details to a Draft Product
Edit or add details to a draft with the "Search" feature in the main dashboard
-
Click "All" in the top right corner
-
Filter by "Draft only"
-
Search for or click on the draft you'd like to edit
-
Click on the pencil icon in the top right corner to make edits
-
Edit any or all of the fields
.gif)
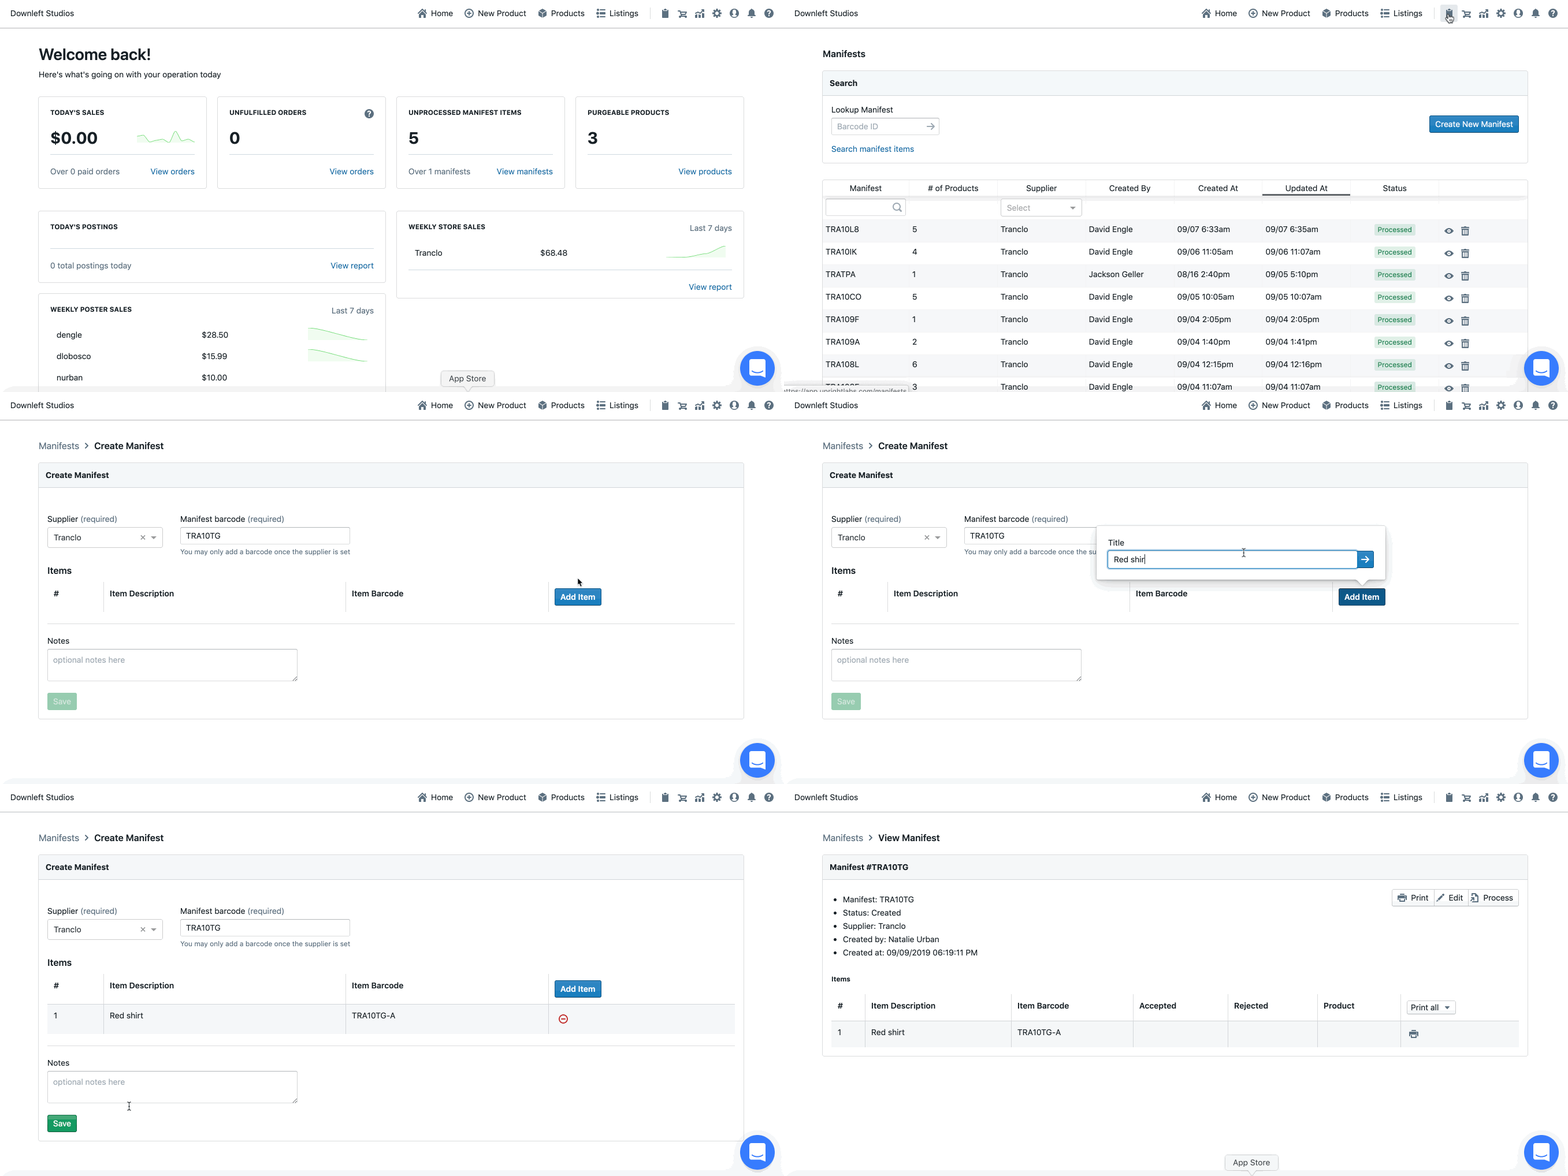
How to Create a Draft Product in Lister
You can create a draft of a product on Upright Lister, and it will then appear on Upright Link:
-
Go to the Upright Lister home page
-
Click on the clipboard icon in the top ribbon to manifest an item
-
Click "Create New Manifest"
-
Click "Add Item"
-
Add in product information
-
Click "Save"
-
Click "Process"
-
Your draft will now appear in Link as well
Have questions? Reach out to us at support@uprightlabs.com or via chat anytime between 9am-6pm ET, Monday to Friday
.gif)
