Overview
Lister Connect is a small piece of software that must be installed and running on each computer that prints barcodes and shipping labels.
This guide outlines the steps needed to install Lister Connect on Windows. Please follow this guide carefully to ensure the installation process is successful.
If you use Mac to print barcodes and shipping labels, please use this guide to install Lister Connect on Mac.
If you're an online seller, you know how hard it is to keep track of your inventory and fulfill orders. Upright Labs helps your team turn your inventory into a meaningful business within minutes at every step of the e-commerce journey. Click below to learn more!
Table of Contents
Step 1: Install Printer Drivers
Step 2: Install Lister Connect
Step 5: Select Printer in Lister
Step 6: Allow and Remember Action Required Popup
Step 7: Verify Lister Connect by Running a Test Print
Step 1: Install Printer Drivers
Follow the link below for your printer manufacturer’s (Zebra or Dymo) drivers.
-
-
IMPORTANT: You must use these drivers for Zebra printers. ZDesigner will not work
-
Step 2: Install Lister Connect
After installing printer drivers, download and install Lister Connect.
-
Click the download package and follow the onscreen installation prompts
Step 3: Restart Browser
After installing printer drivers and Lister Connect, you will need to restart your browser window to continue.
-
Close and reopen all your browser windows before continuing
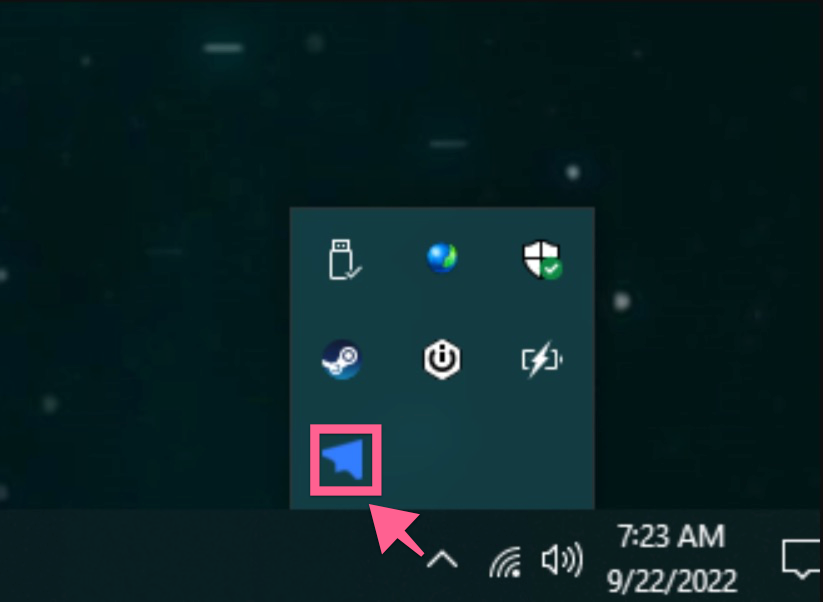
Step 4: Start Lister Connect
Ensure that Lister Connect is running on your computer. It should appear in your system tray at the bottom right of the screen.
NOTE: Lister Connect must be running locally on your PC anytime you want to print from Lister.
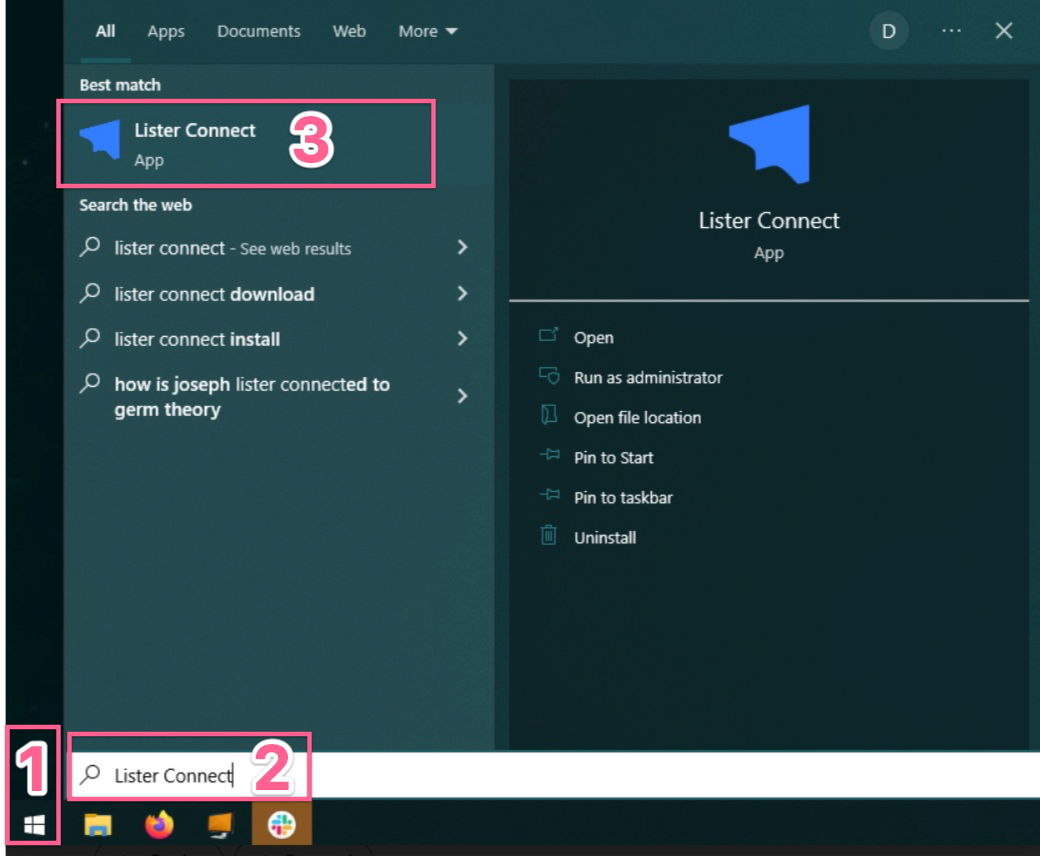
If the Lister Connect icon isn’t showing in the system tray, try the following:
-
Open the Windows menu
-
Type “Lister Connect” into the search bar
-
Click the Lister Connect icon
Step 5: Select Printer in Lister
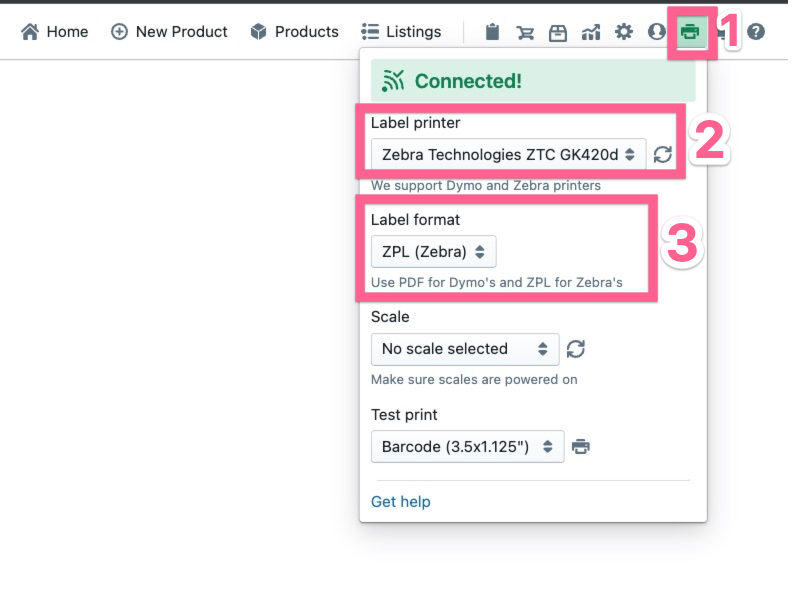
After approving the browser certificate, the printer will become available in Lister. This step connects your printer to Lister so you can begin printing. Login to Upright Lister by following this link and complete the following:
-
Click the printer icon in the top right corner
-
Select your label printer from the dropdown menu
-
Set your label format
-
Note: It's essential that your "Label format" is set correctly. If you are using a Zebra printer, set your format to "ZPL." Anything else should be set to "PDF"
-
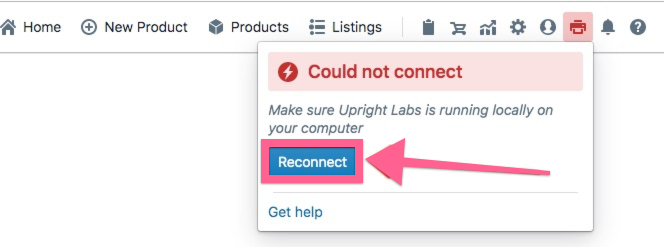
Lister will auto-connect to your printer as long as Lister Connect is running on your computer. If Lister Connect is not running, Lister will not be able to print.
If the printer is not connected, ensure Lister Connect is running by following step 4 above, then press reconnect.
Step 6: Allow and Remember Action Required Popup
A popup may appear when clicking "Connect" in the Lister Connect dropdown menu from step 5:
-
Click the checkbox next to "Remember this decision"
-
Click "Allow"

Step 7: Verify Lister Connect by Running a Test Print
Finally, run a test print within Lister to ensure everything is correctly set up.
-
Follow this guide to learn how to run a test print with Lister
-
If the labels are printing but not printing correctly, follow this guide on printer troubleshooting
-
If labels are not printing at all, follow this guide on Lister Connect Troubleshooting on Windows